
Adding Database
- Login to SiteWorx
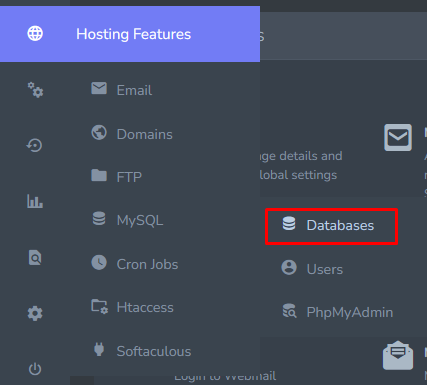
- Go to Navigation Sidebar -> Hosting Features > My SQL > Databases
- Click + button and open the Add MySQL Database form

- Update the desired fields
- Database Name: The name of the database. SiteWorx will automatically append the unix username of the SiteWorx to the database name provided
- Create User: Checking this box will expand the form to include database user options. Creating a database user for the new wordpress database is recommended
- Password/Confirm Password: The password for the database user. Clicking the Magic Wand will automatically generate a secure password
- MySQL User Permissions: The permissions the database user should have
- When Connecting From: The host the database user will connect from. % is the default, which is a wildcard
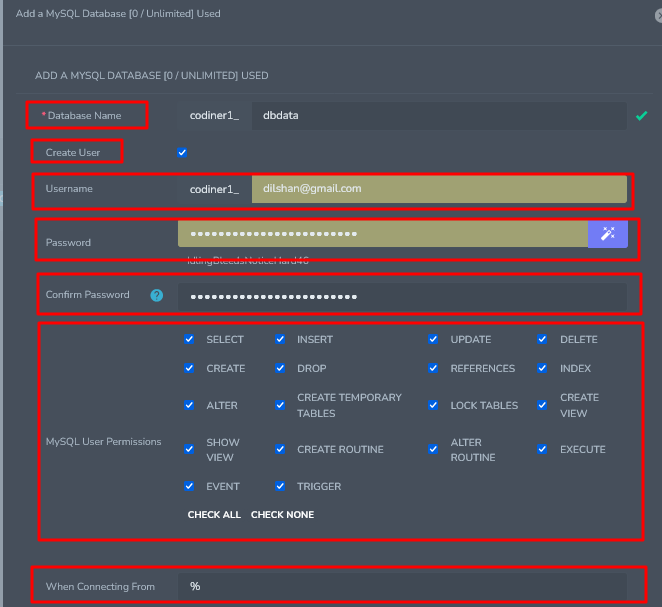
- Click Add button

Delete a Database
- Login to SiteWorx
- Go to Navigation Sidebar -> Hosting Features > My SQL > Databases
- Click the Delete icon next to the database to delete.

- opens the Confirmation form
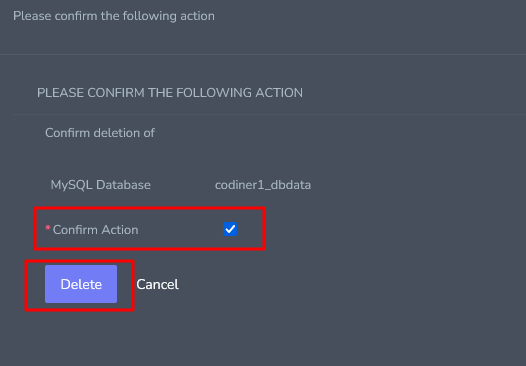
- Select the Confirm Action checkbox
- Click Delete Button
