
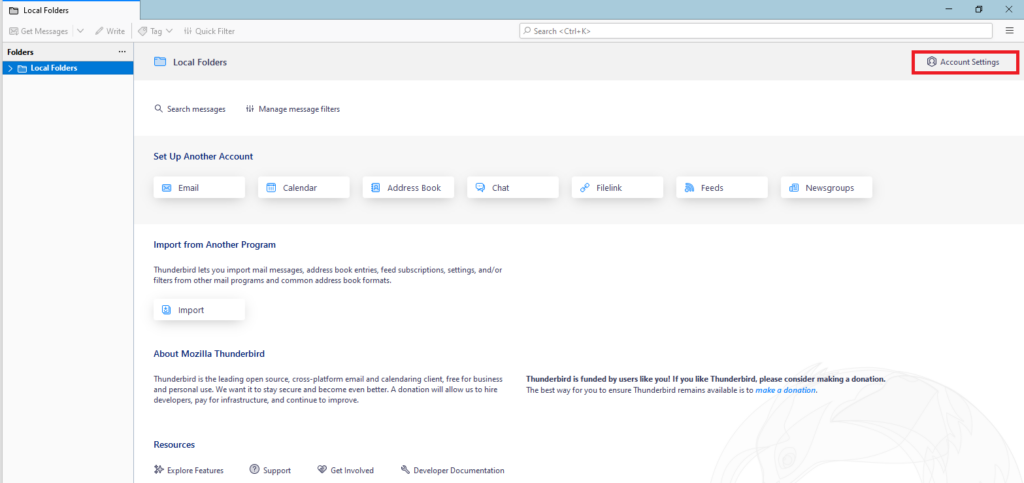
Open Thunderbird application and click Account Setting
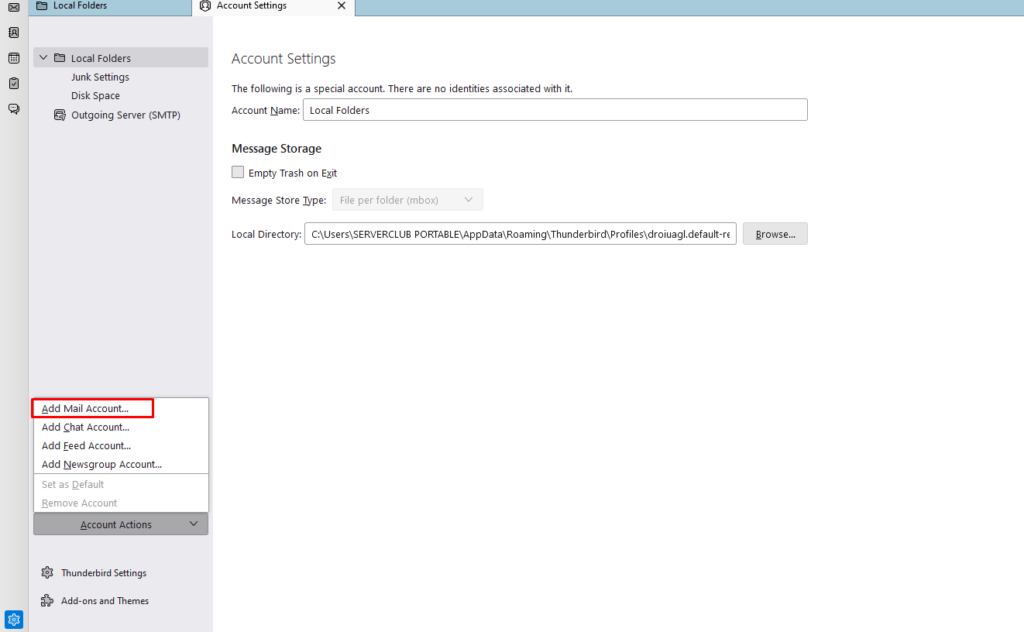
Drop down the Account action section and click Add Mail Account
Next go to Set UP Your Existing Email Address page
Fill Your full name, Email address, Password sections
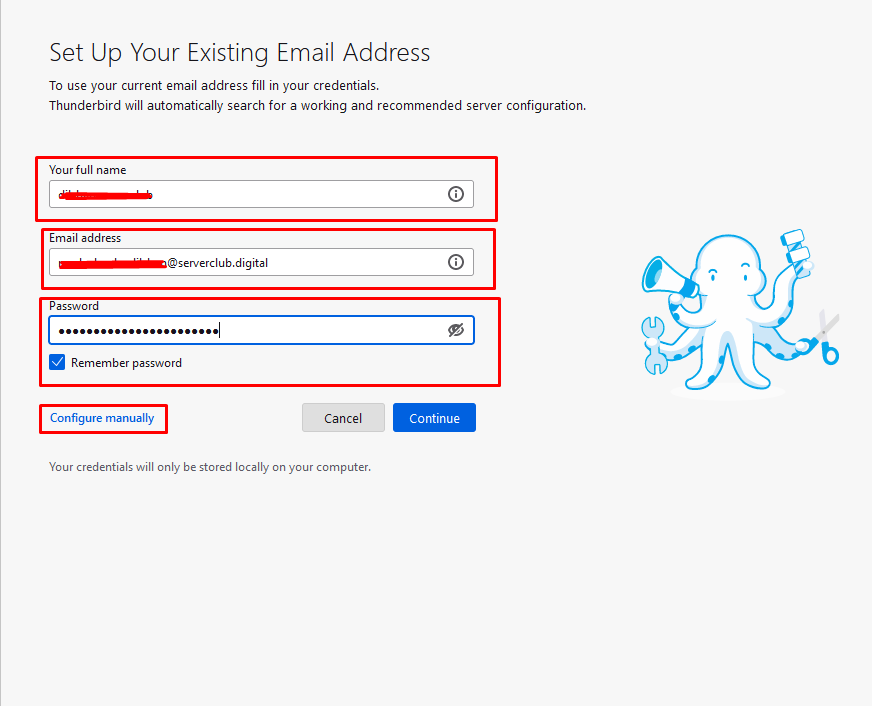
After click Configure manually button and go to Manual Configuration section
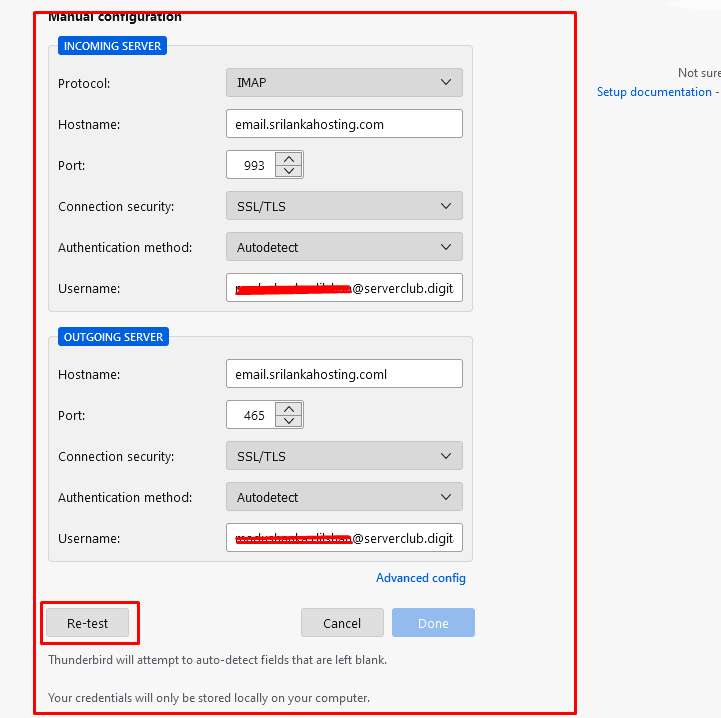
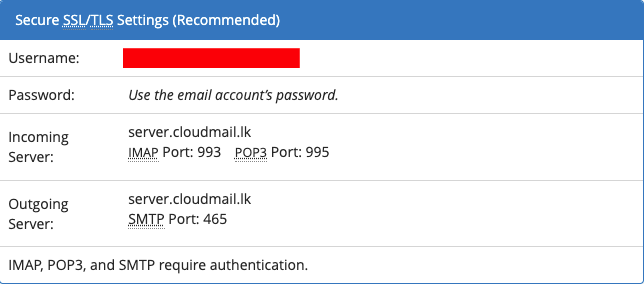
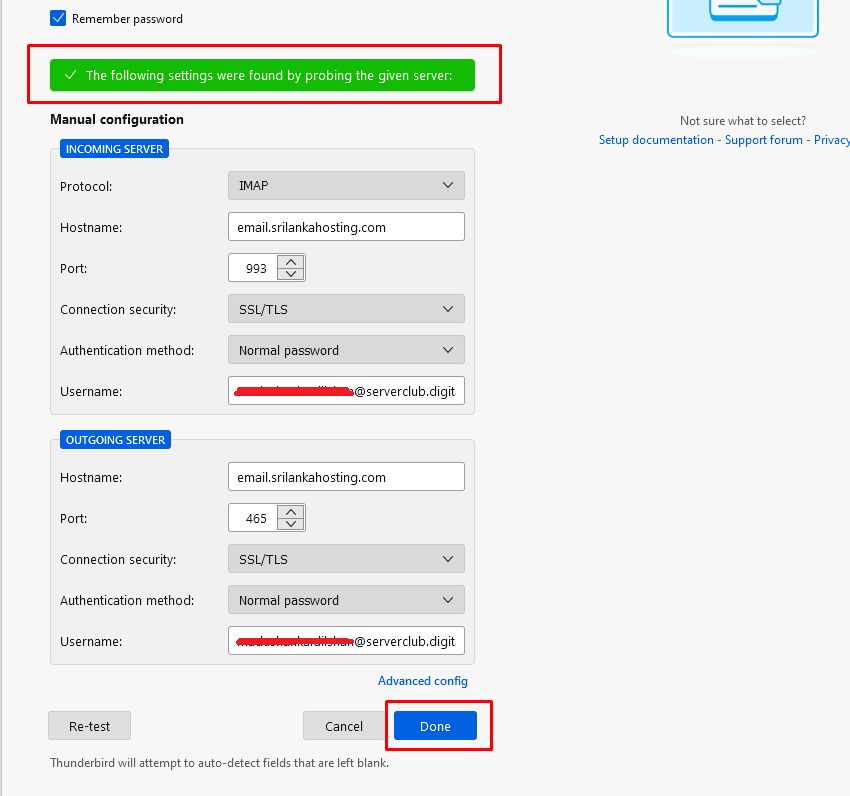
Fill the Incoming Server and Out going server sections follow below image.
After click Re-test button and checking correct details.
After display green color message on the page and next click Done button.
Finally go to Account successfully created page and click Finish button.

Your Thunderbird Account Successfully Created
